Download Overview
| Version | amd64 | i386 | arm64 |
|---|---|---|---|
| OVA (NONE) | DOWNLOAD | DOWNLOAD | |
| OVA (IIOT) | DOWNLOAD | DOWNLOAD | |
| OVA (VPN, VNC, KEEPSSHKEYS) | DOWNLOAD | DOWNLOAD | |
| QCOW (NONE) | DOWNLOAD | DOWNLOAD | DOWNLOAD |
| QCOW (IIOT) | DOWNLOAD | DOWNLOAD | DOWNLOAD |
| QCOW (VPN, VNC, KEEPSSHKEYS) | DOWNLOAD | DOWNLOAD | DOWNLOAD |
Which Version should I use?
This guide will help you choose the right download for your architecture and virtualization manager.
NONE vs. IIOT vs. VPN, VNC, KEEPSSHKEYS?
Some labs need additional packages and configurations, leading to different flavors of the vLab-OS. Which flavor you need is described in the specific lab section. If no flavor is specified, use the NONE version.
OVA vs QCOW?
We provide the two vLab-OS file types to support different architectures and virtualization managers.
OVA: If you have an amd64 architecture (also called x86), you can use Virtualbox as a virtualization manager and download the appropriate flavored OVA file. Virtualbox also supports i386 architecture; therefore, the i386 OVA file is suitable if you still have an i386 architecture (which was discontinued in 2007).
QCOW: If you have an arm64 architecture and macOS, we advise using UTM with the appropriate flavored QCOW file to run the VM natively without emulating the arm64 architecture. UTM does not support the creation of a VM over the command line, making it impossible for us to build the VM automatically. So, you need to create the VM yourself. Do not worry; it is relatively easy.
For instructions on how to run the vLab-OS with the different virtualization managers, see below.
Running the Image
You need the correct file type and virtualization manager to run the image. Therefore, download the matching file type described above and follow the virtualization manager's instructions to install it (Virtualbox documentation, UTM documentation). The QCOW files are zipped, so you need to unzip them before using them.
Virtualbox
1. After installing Virtualbox, open it and click "Import" to start the process.

2. Choose the downloaded file and press "Next".

3. You see an overview of the virtual machine and can press "Finish" to finalize the image import.

Improving Perfomance
vLab-OS is configured with minimal system requirements in mind. All lab parts can be done with the settings, but the VM can sometimes be slow. If your computer has more resources, you can change the settings to improve the performance. The following instructions will explain the necessary steps.
1. After importing the VM image, click on it and click "Settings" to open the settings.

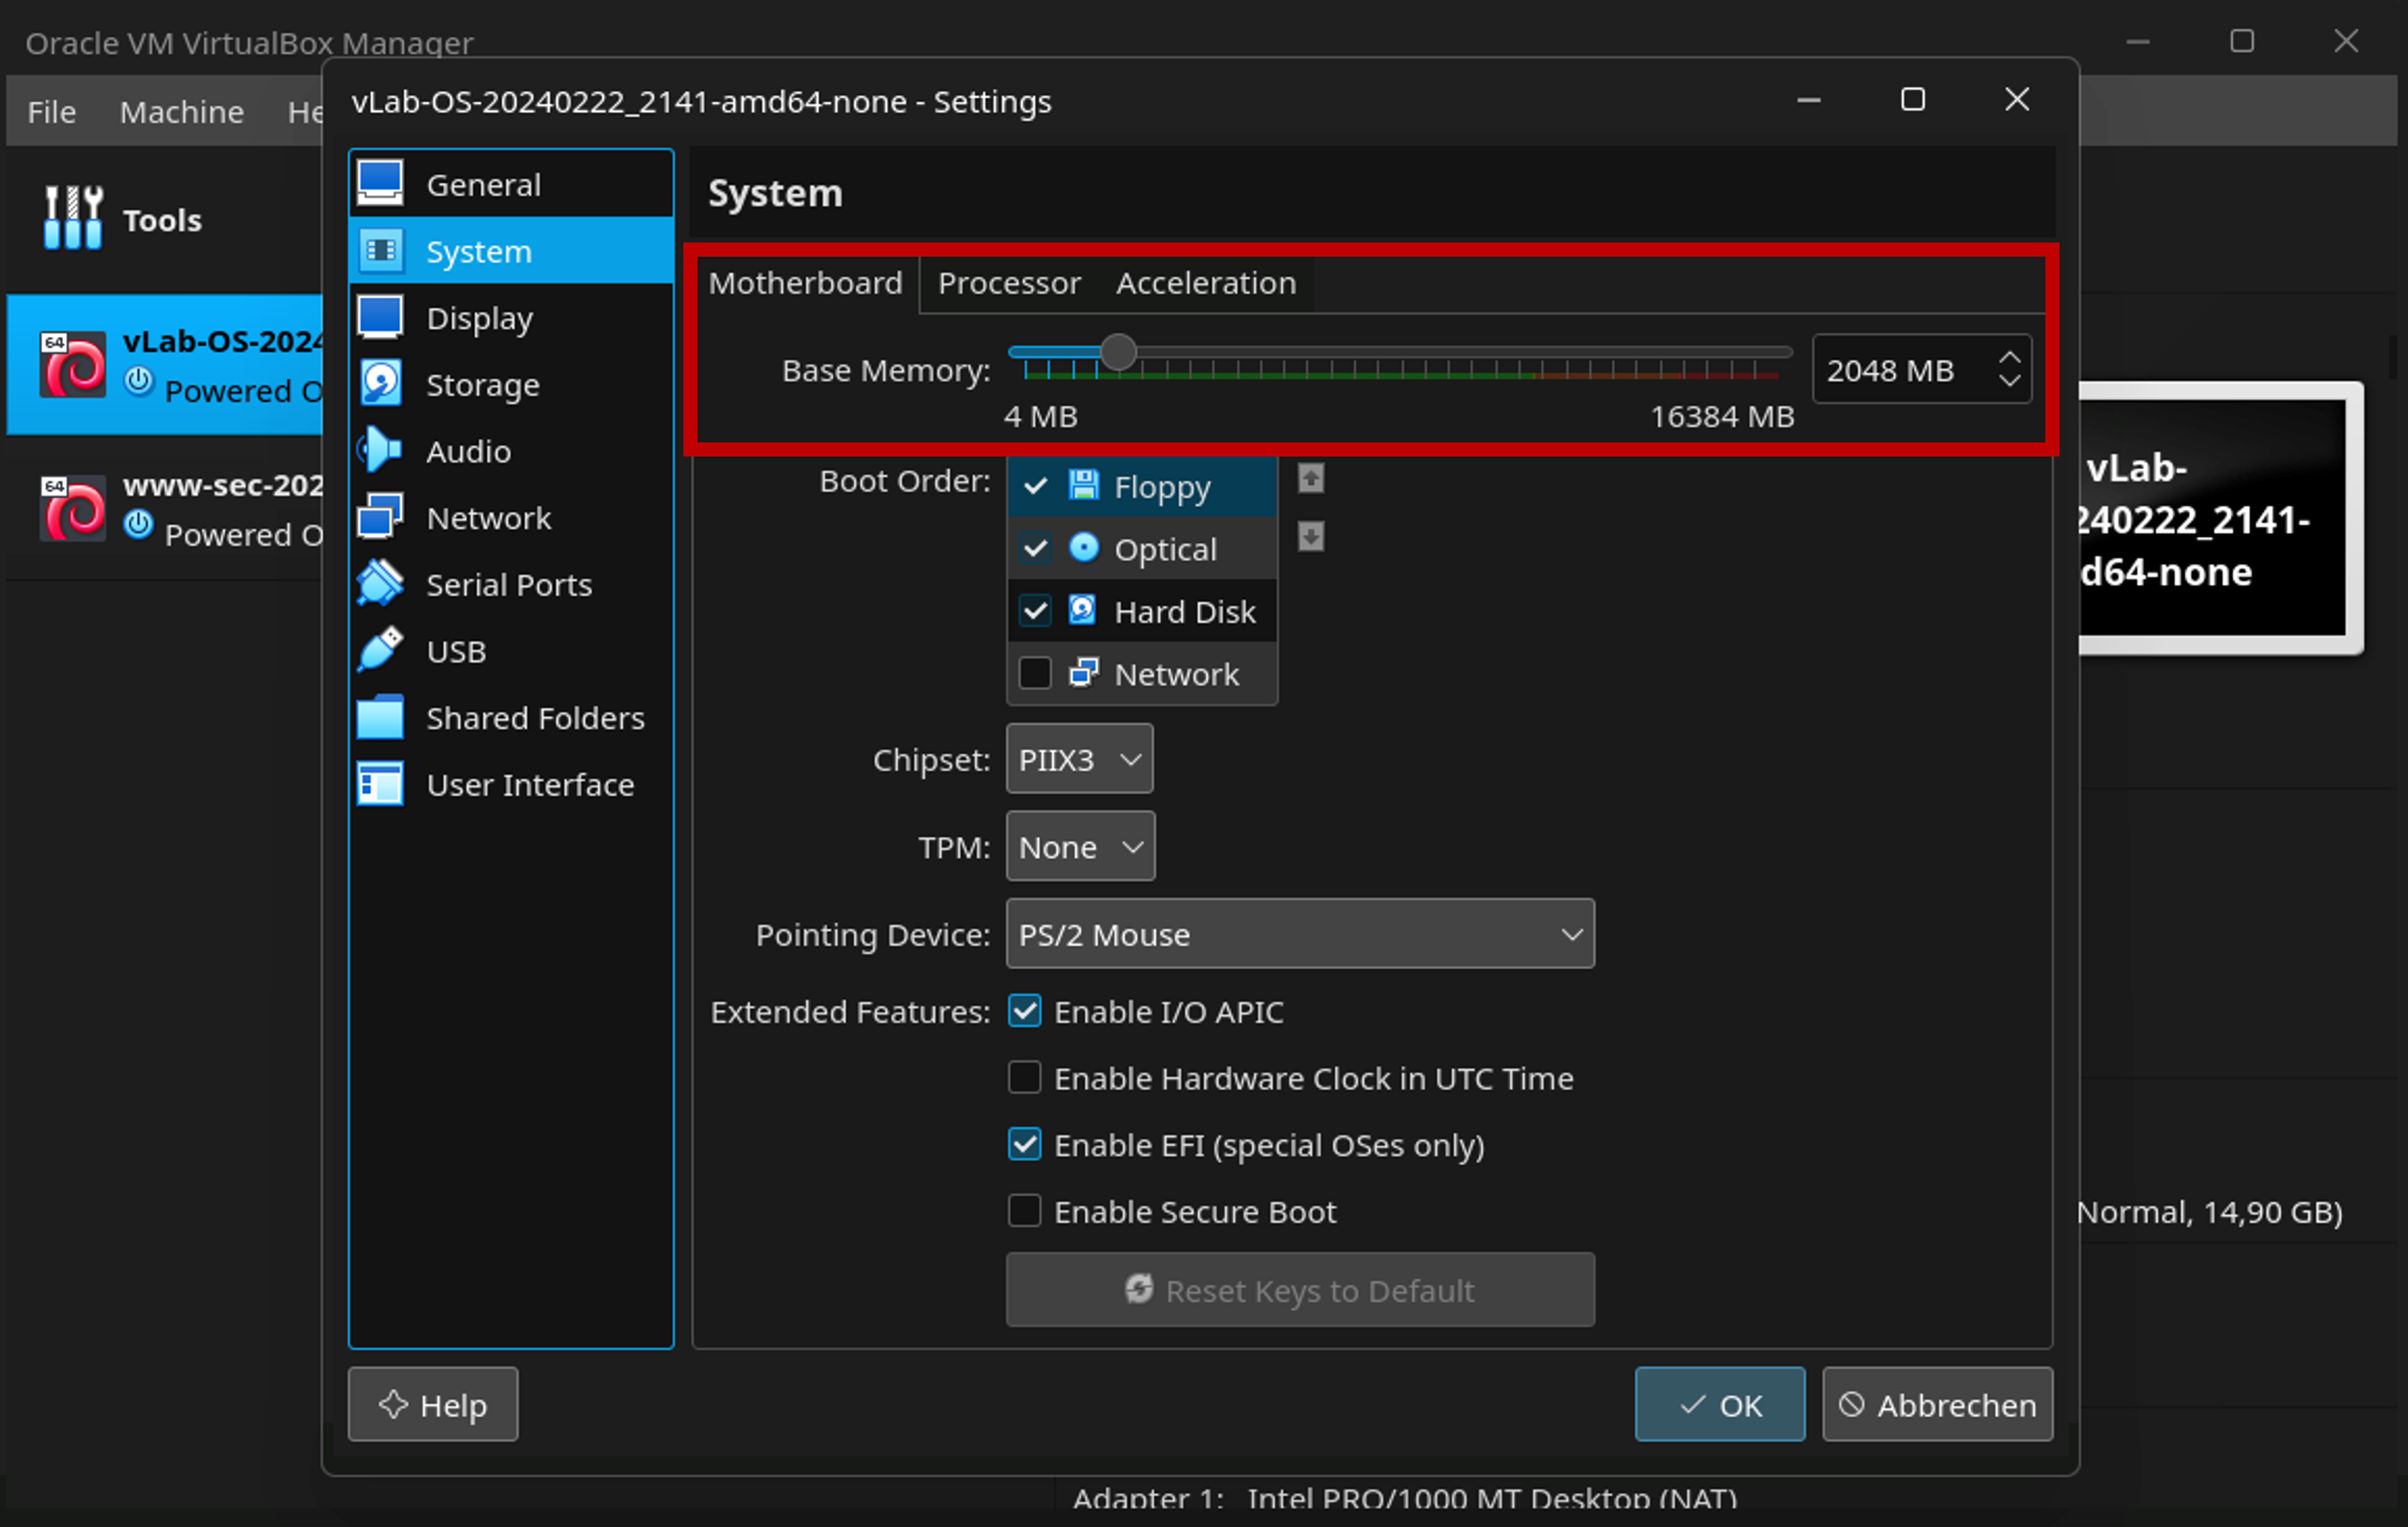
2. Click on "System".

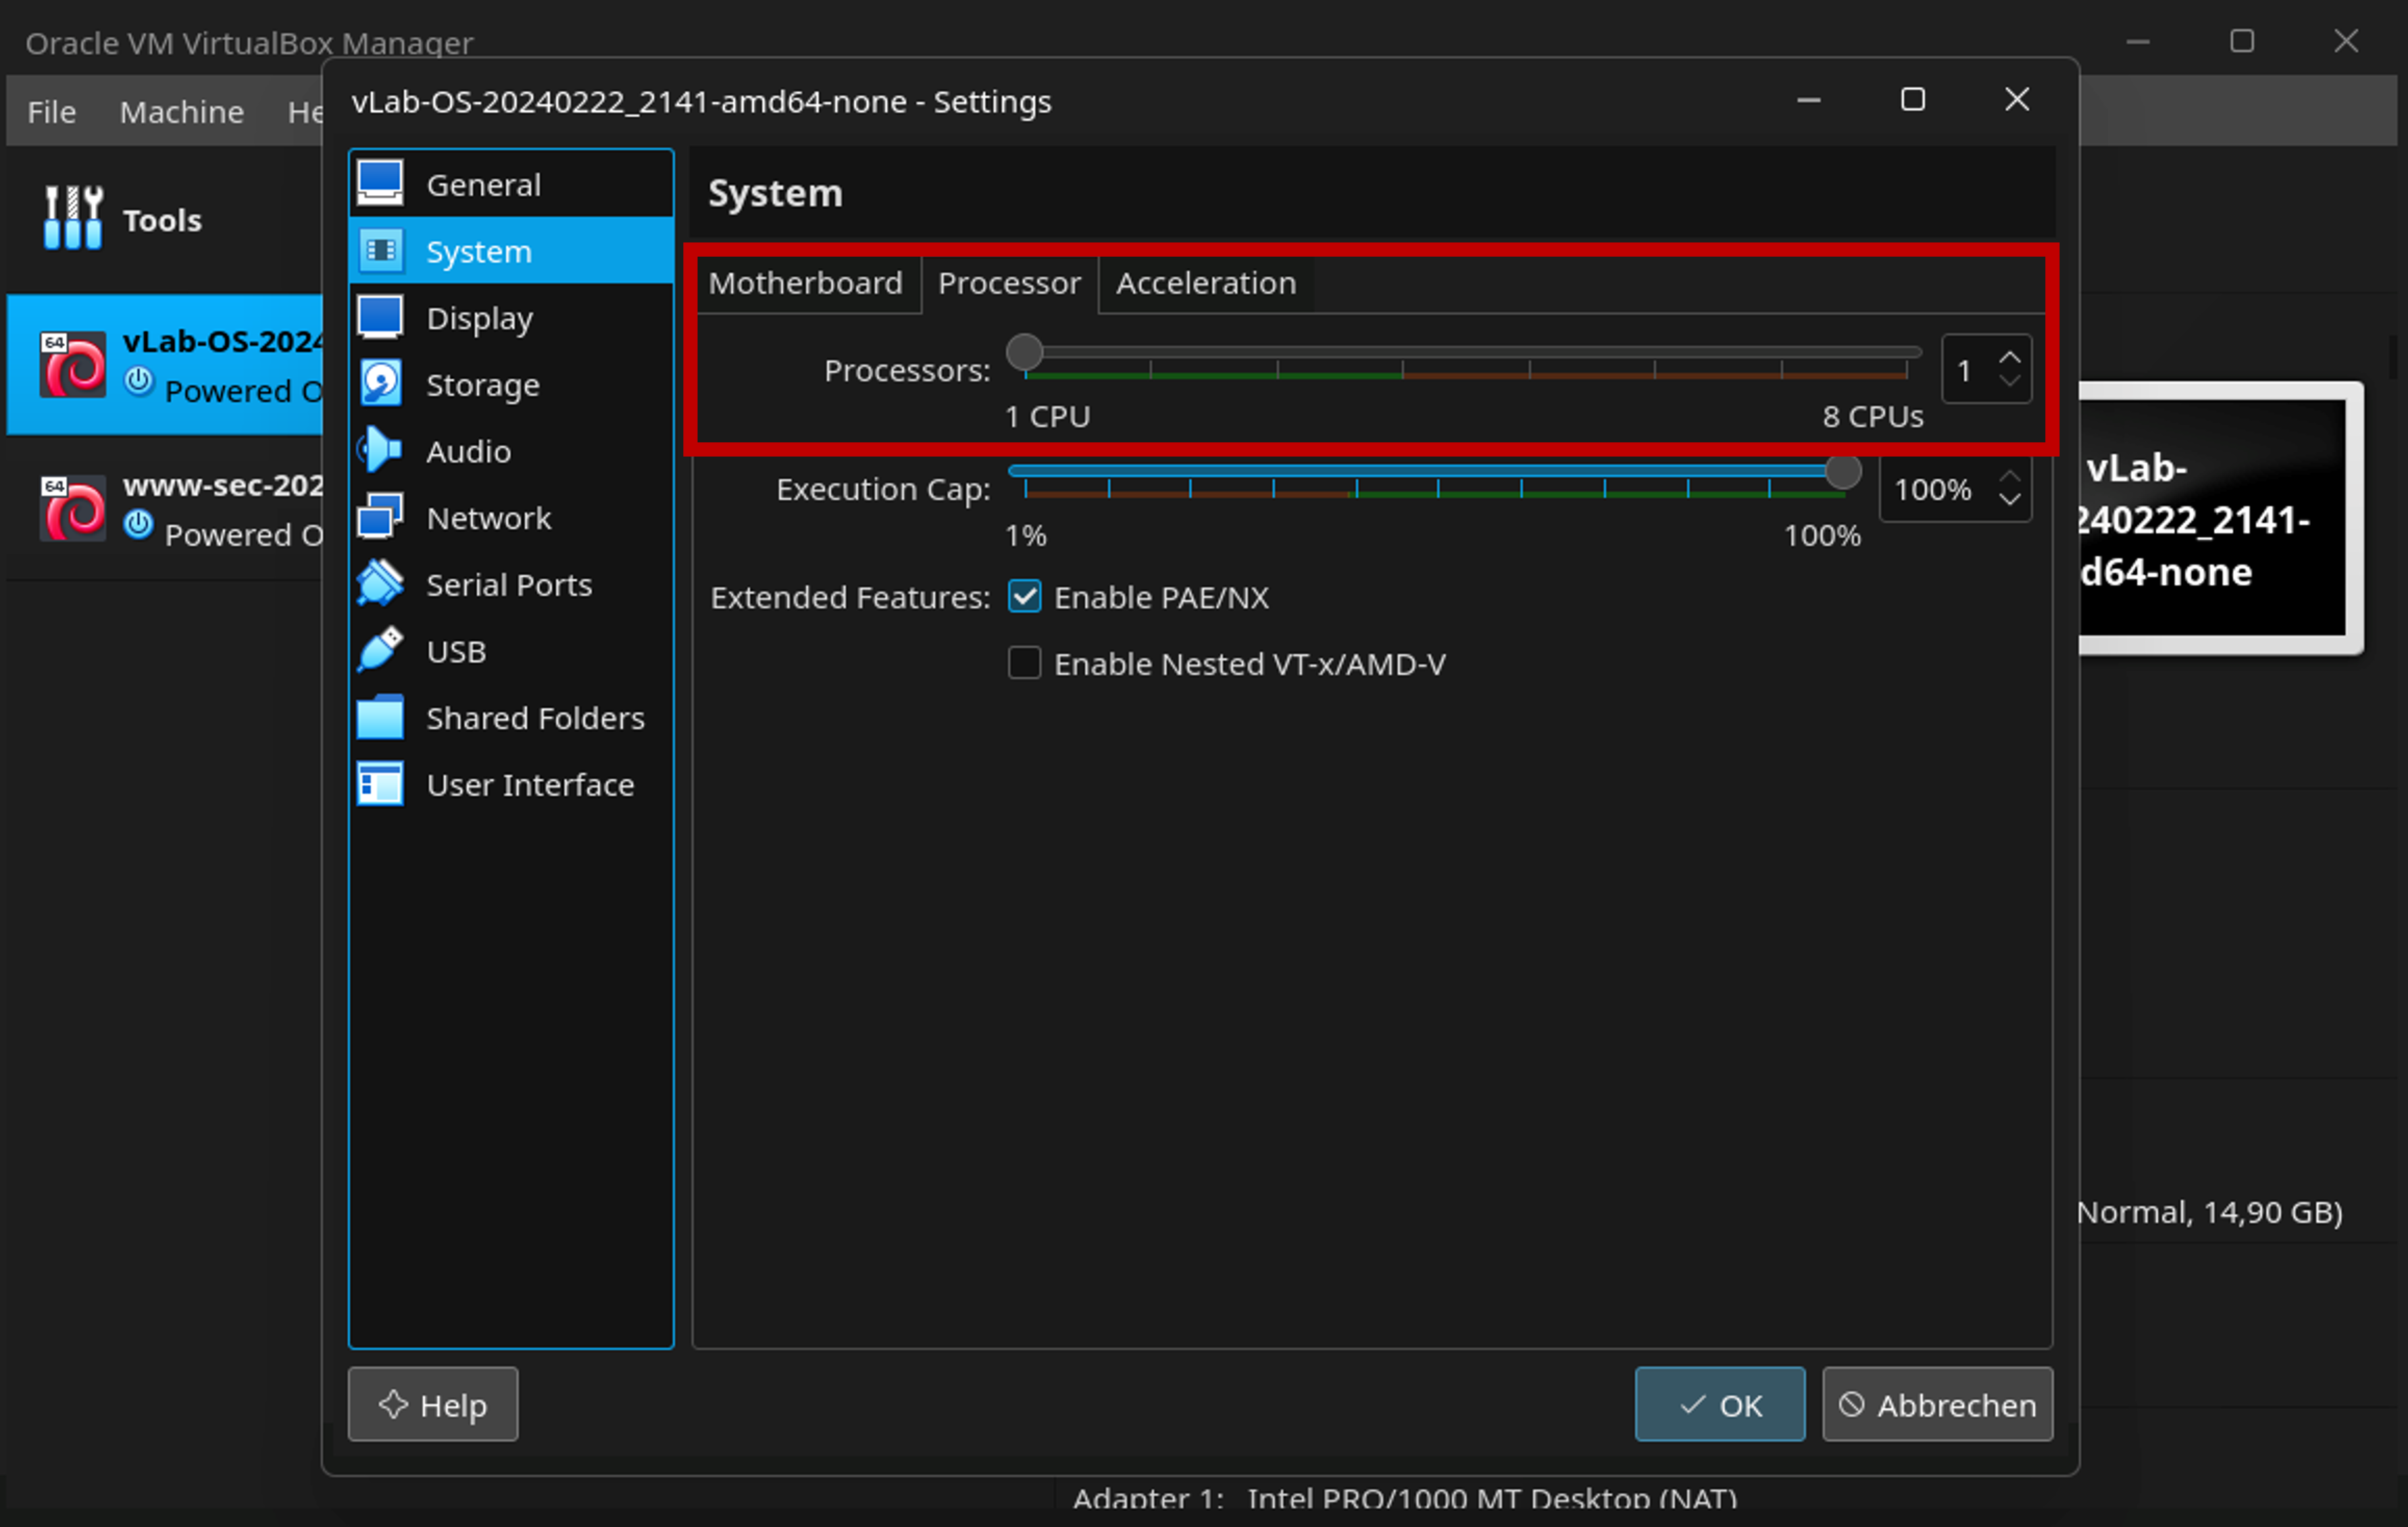
3. Choose a suitable memory setting for the VM image, the specific value depends on your system, but everthing in the green range should work. Then click on "Processor".
4. Choose a suitable number of CPUs for the VM image, the specific value depends on your system, but everthing in the green range should work. Then press "OK" to save the settings.
UTM
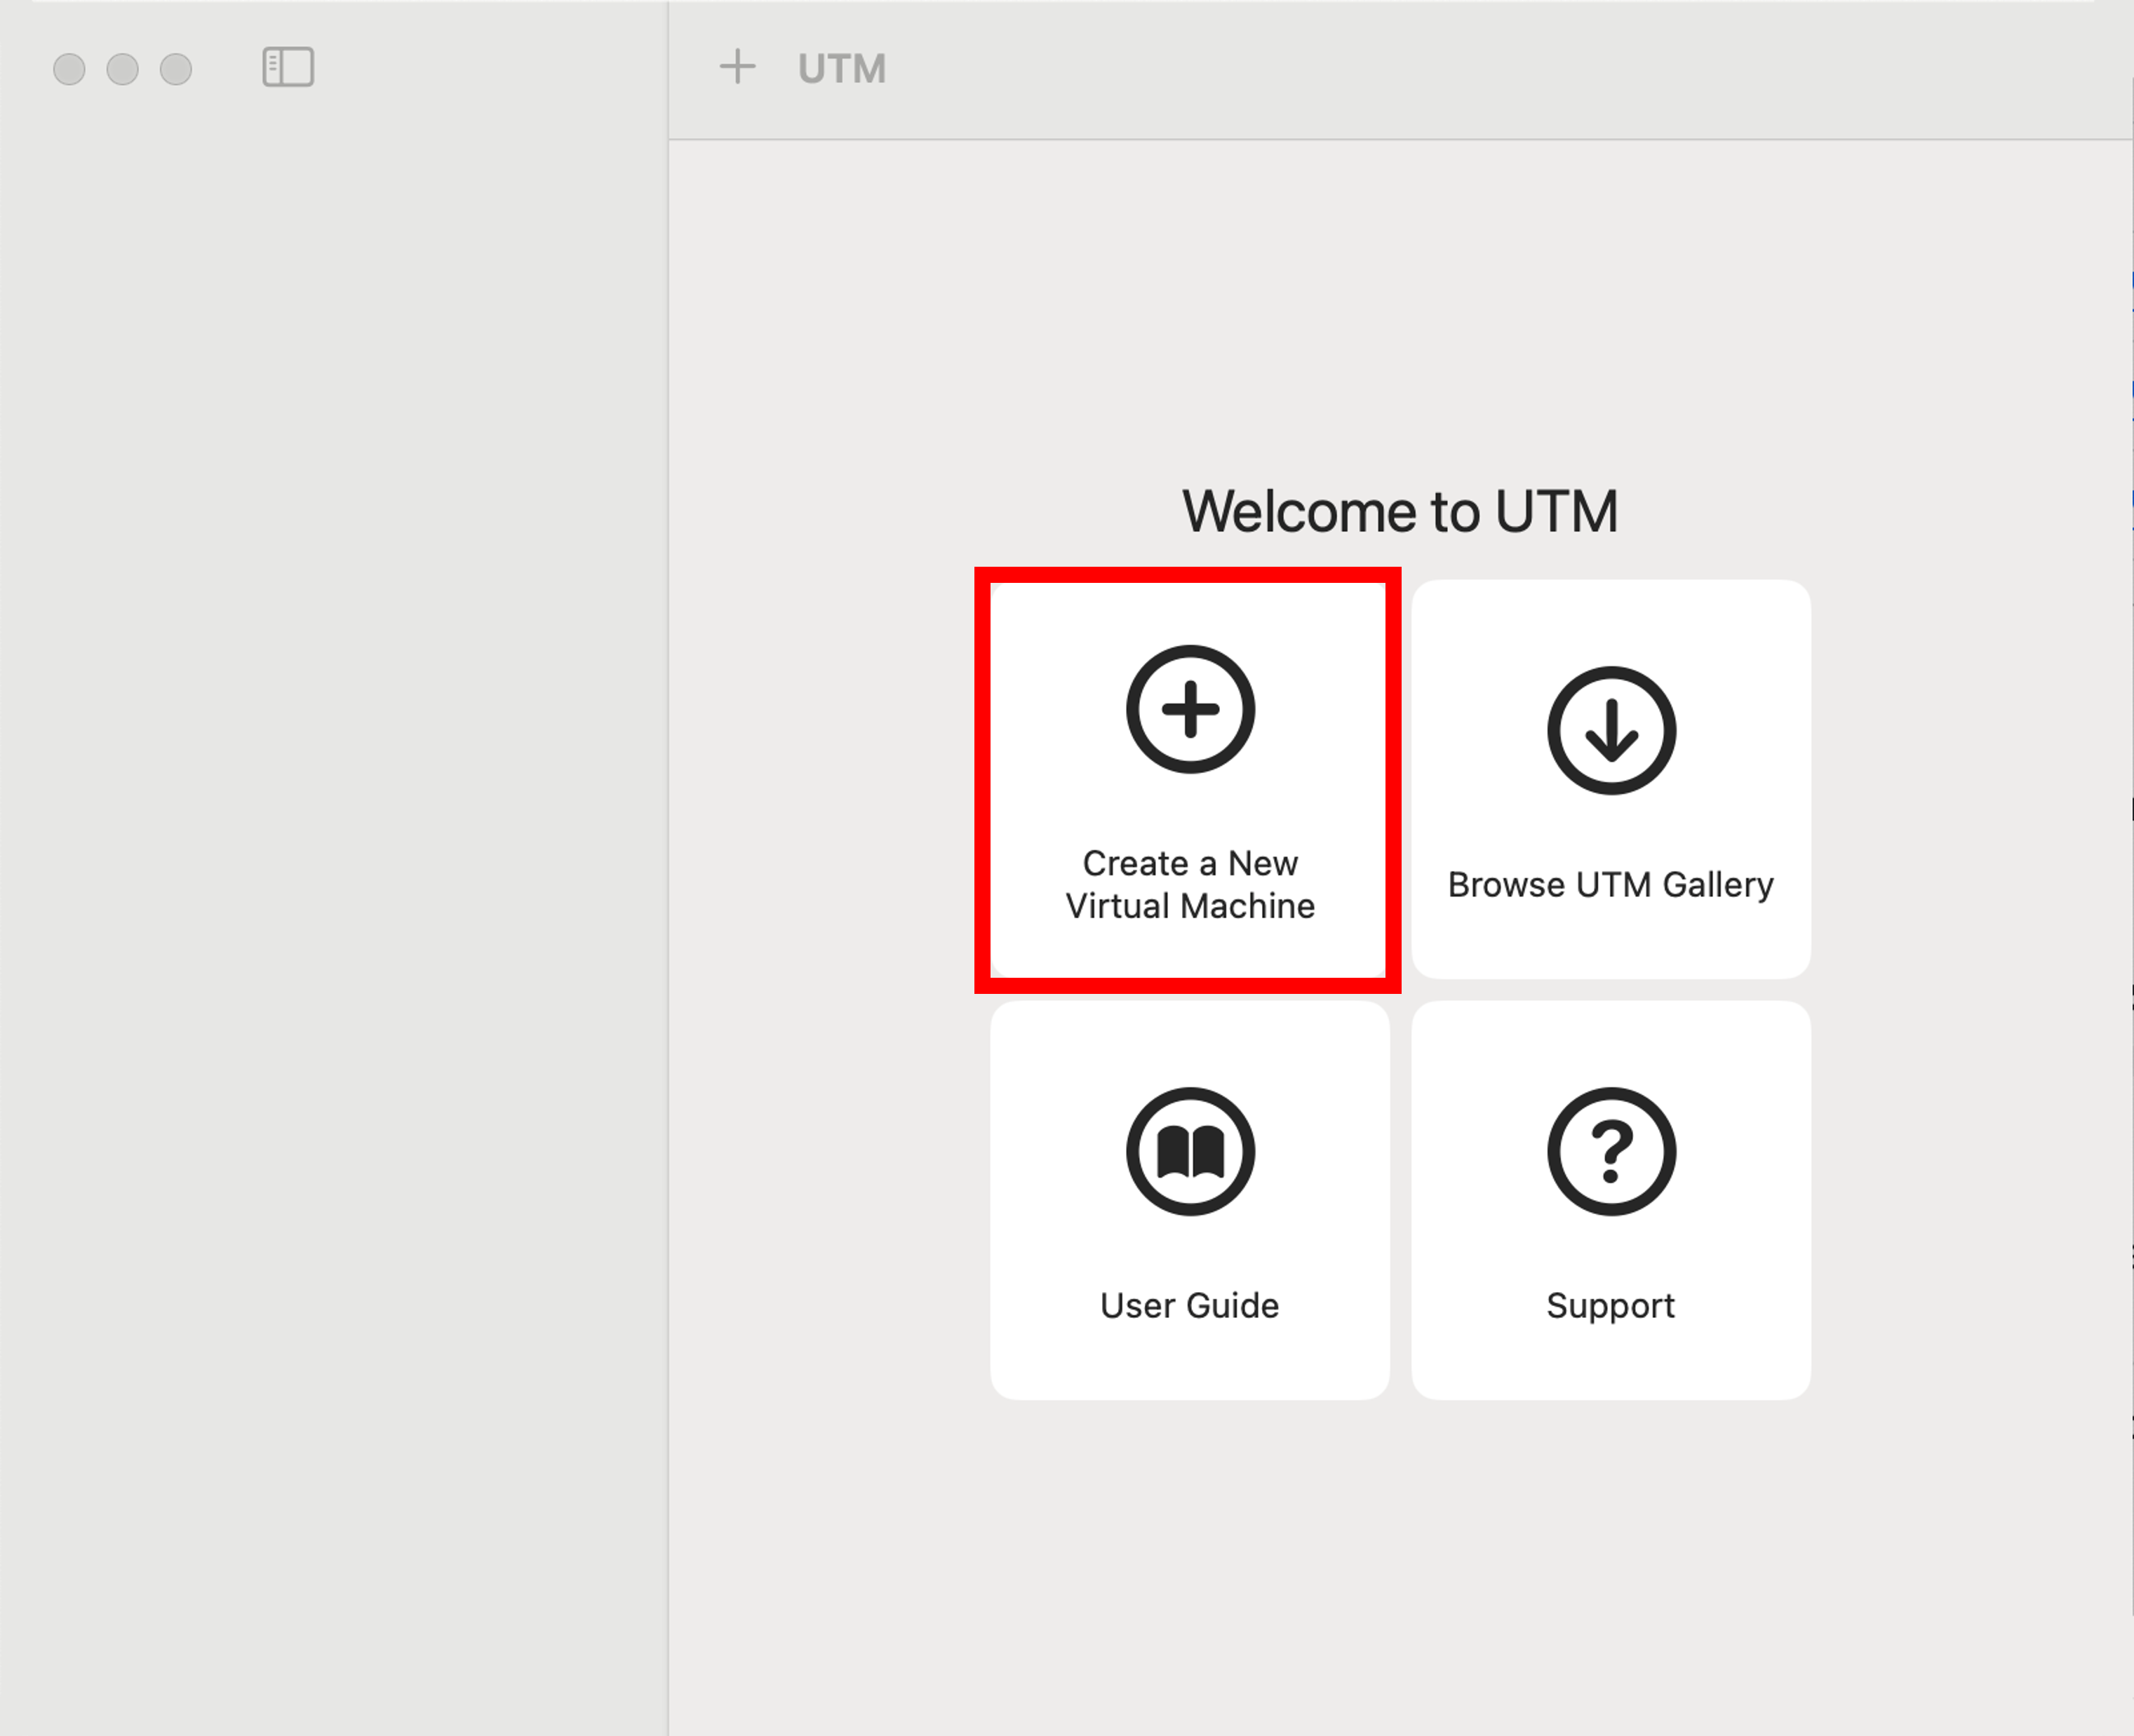
1. After installing UTM, open it and click "Create a New Virtual Machine" to start the process.
2. Click on "Virtualize".

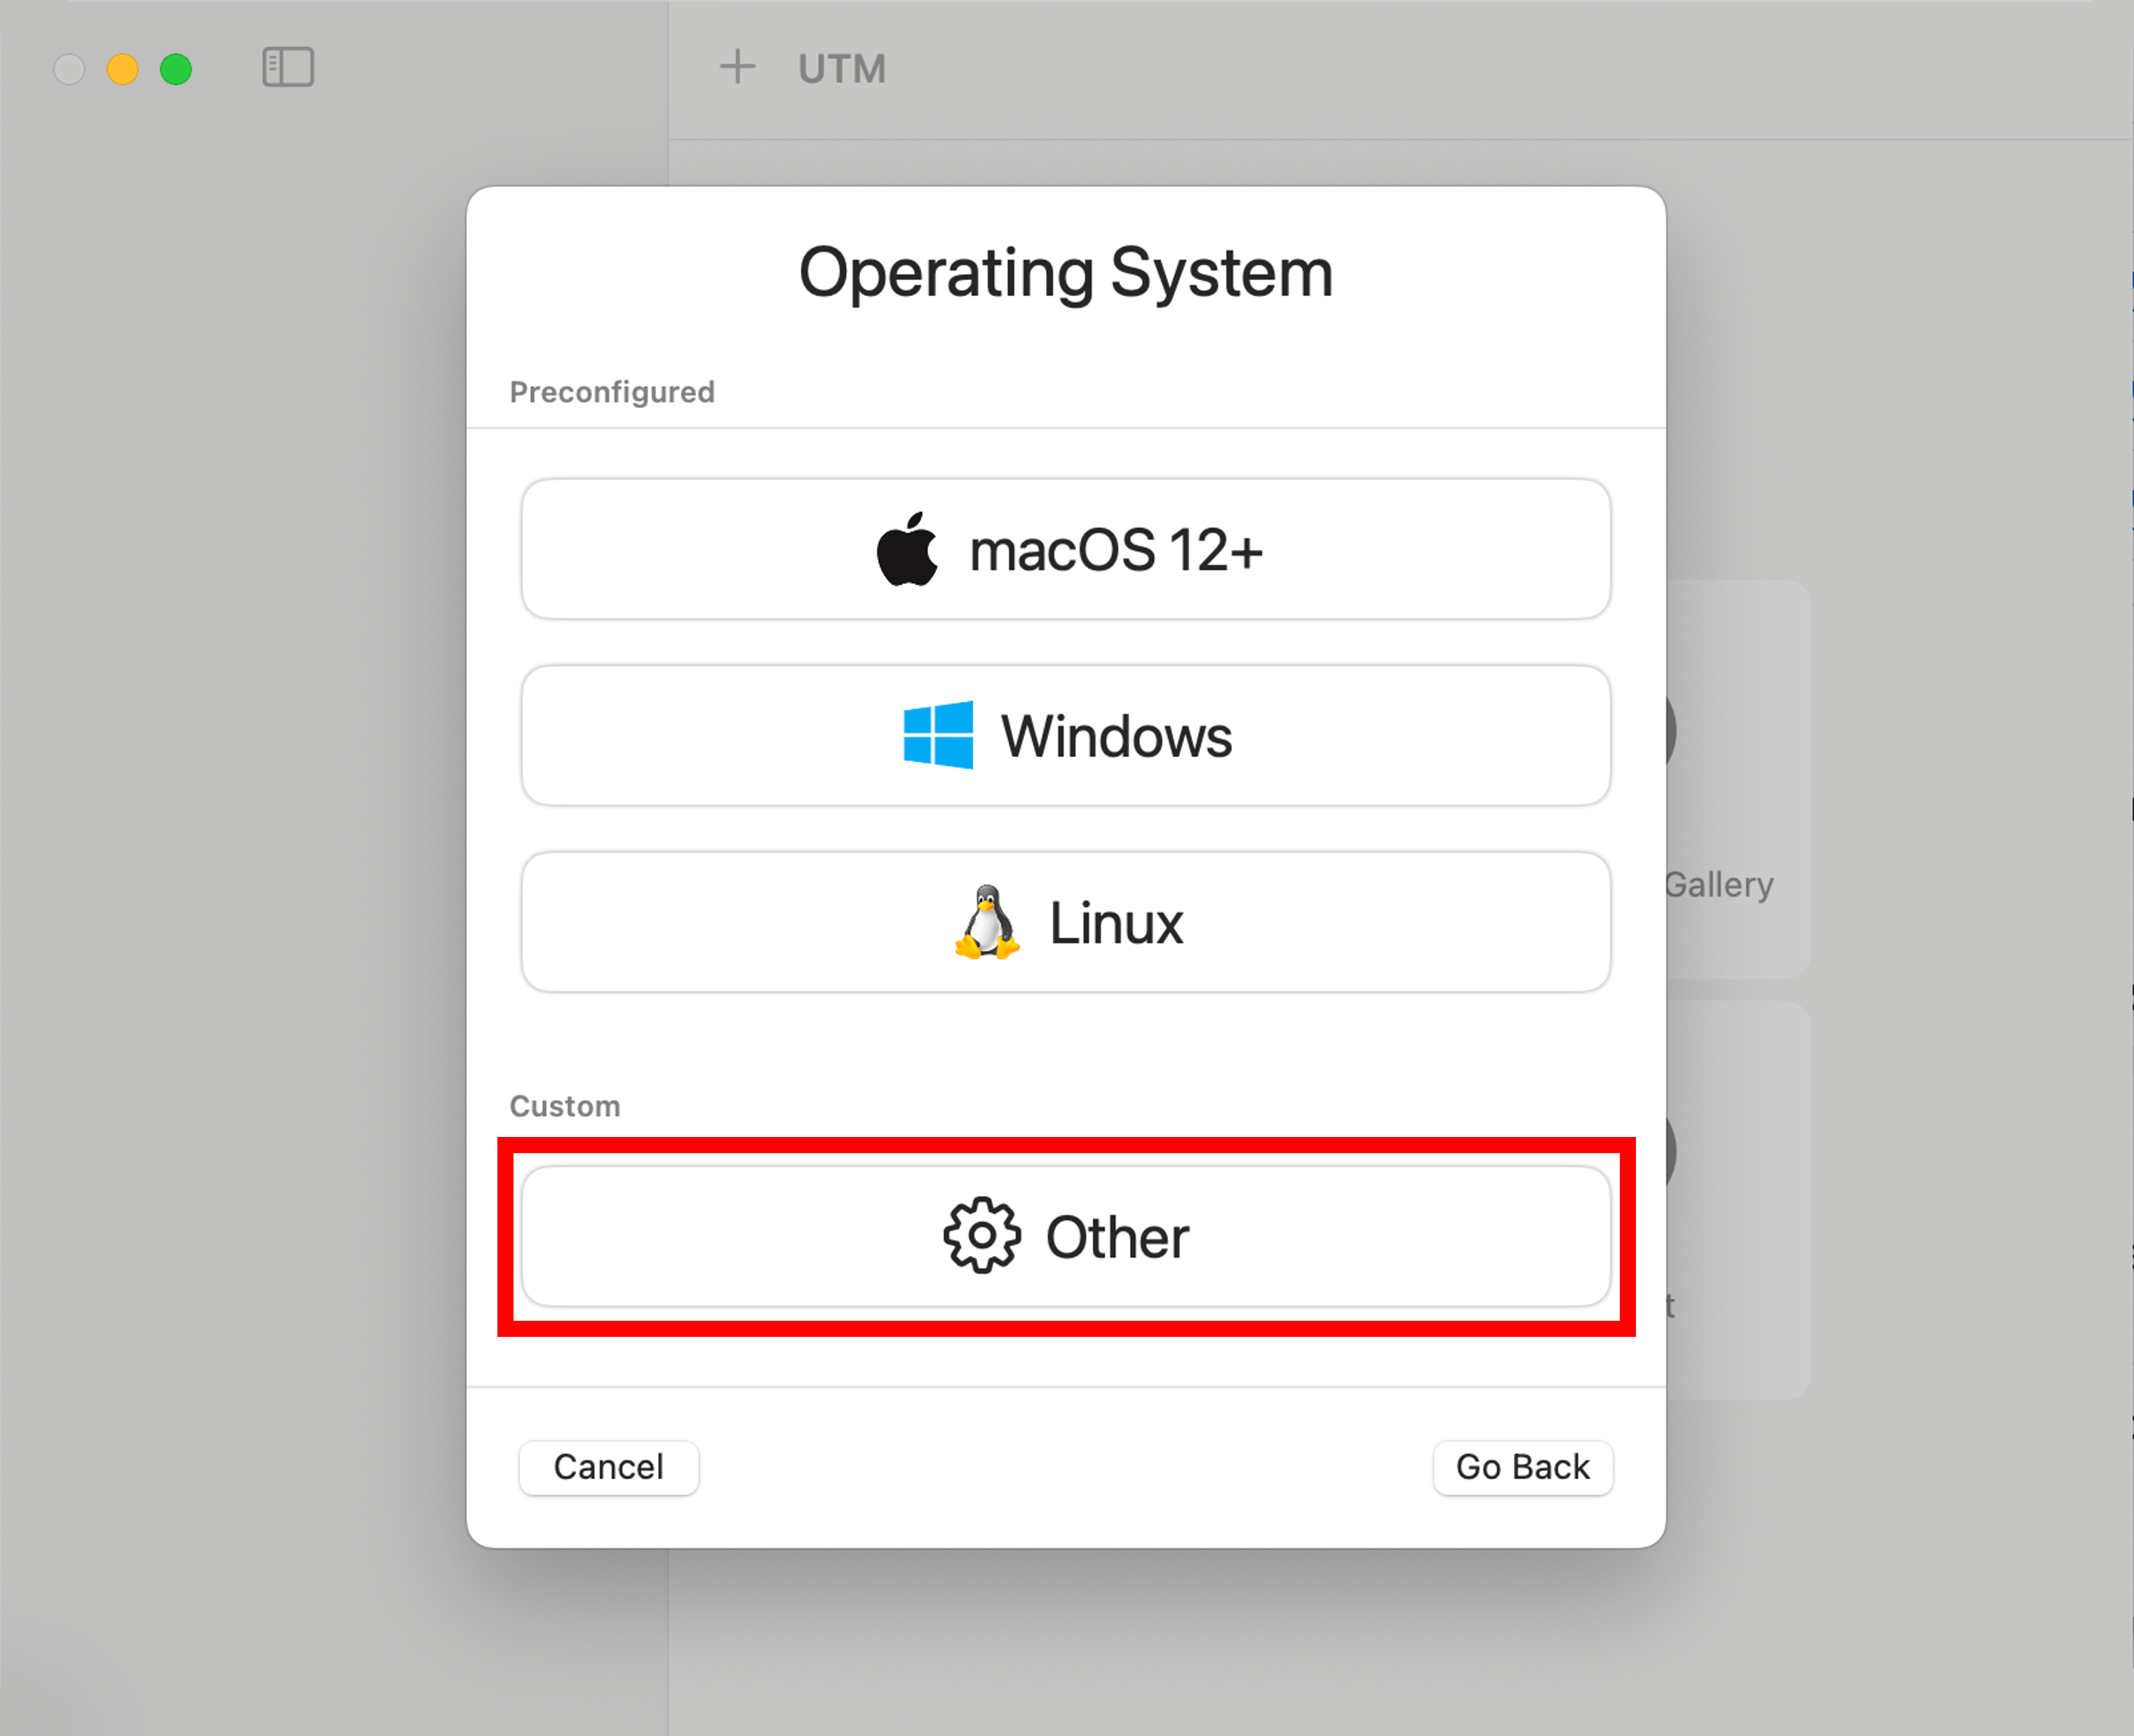
3. Choose "Other".
4. Choose "None"

5. Click on "Continue".

You can modify the Memory and CPU Cores to better match your system, but you can leave it as is.
6. Click on "Continue".

7. Click on "Continue".

8. Click on "Continue".

If you want, you can change the name of the VM
9. Click on "Save".

Now, we need to change the VM disk to import the QCOW disk.

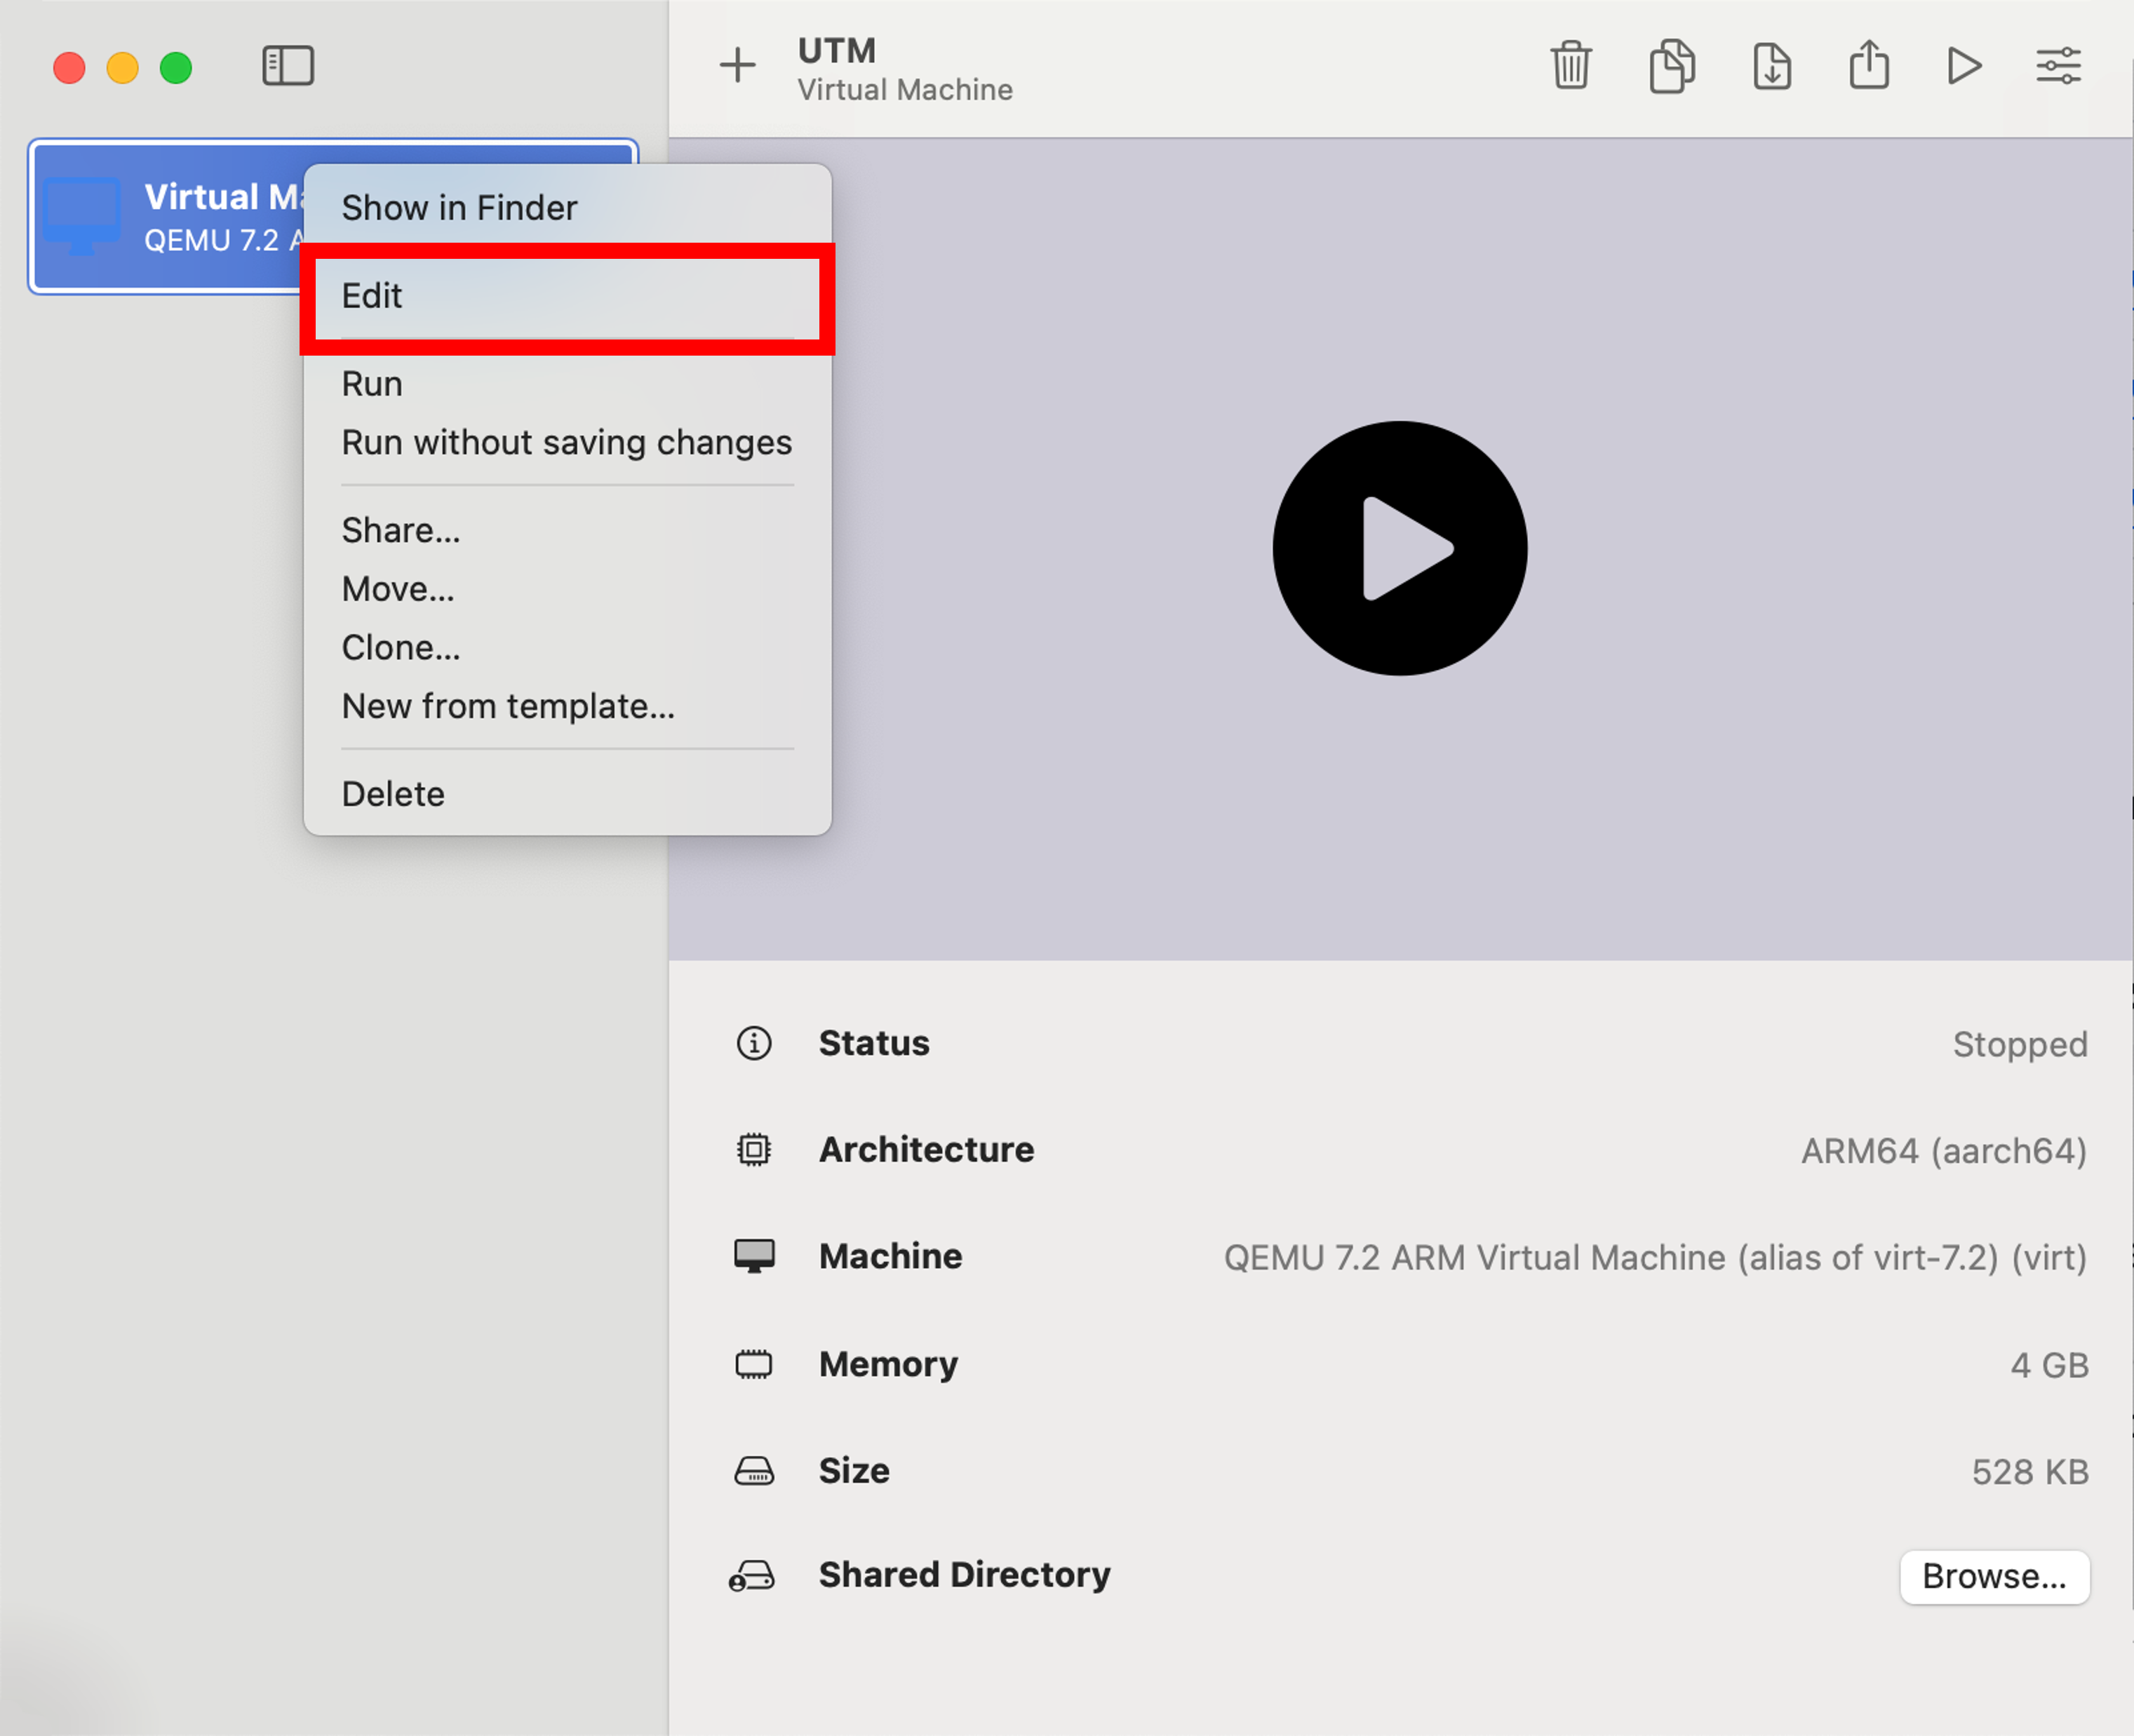
10. Right-click on the machine and click "Edit".
11. Right-click on the Drive and click on "Delete".
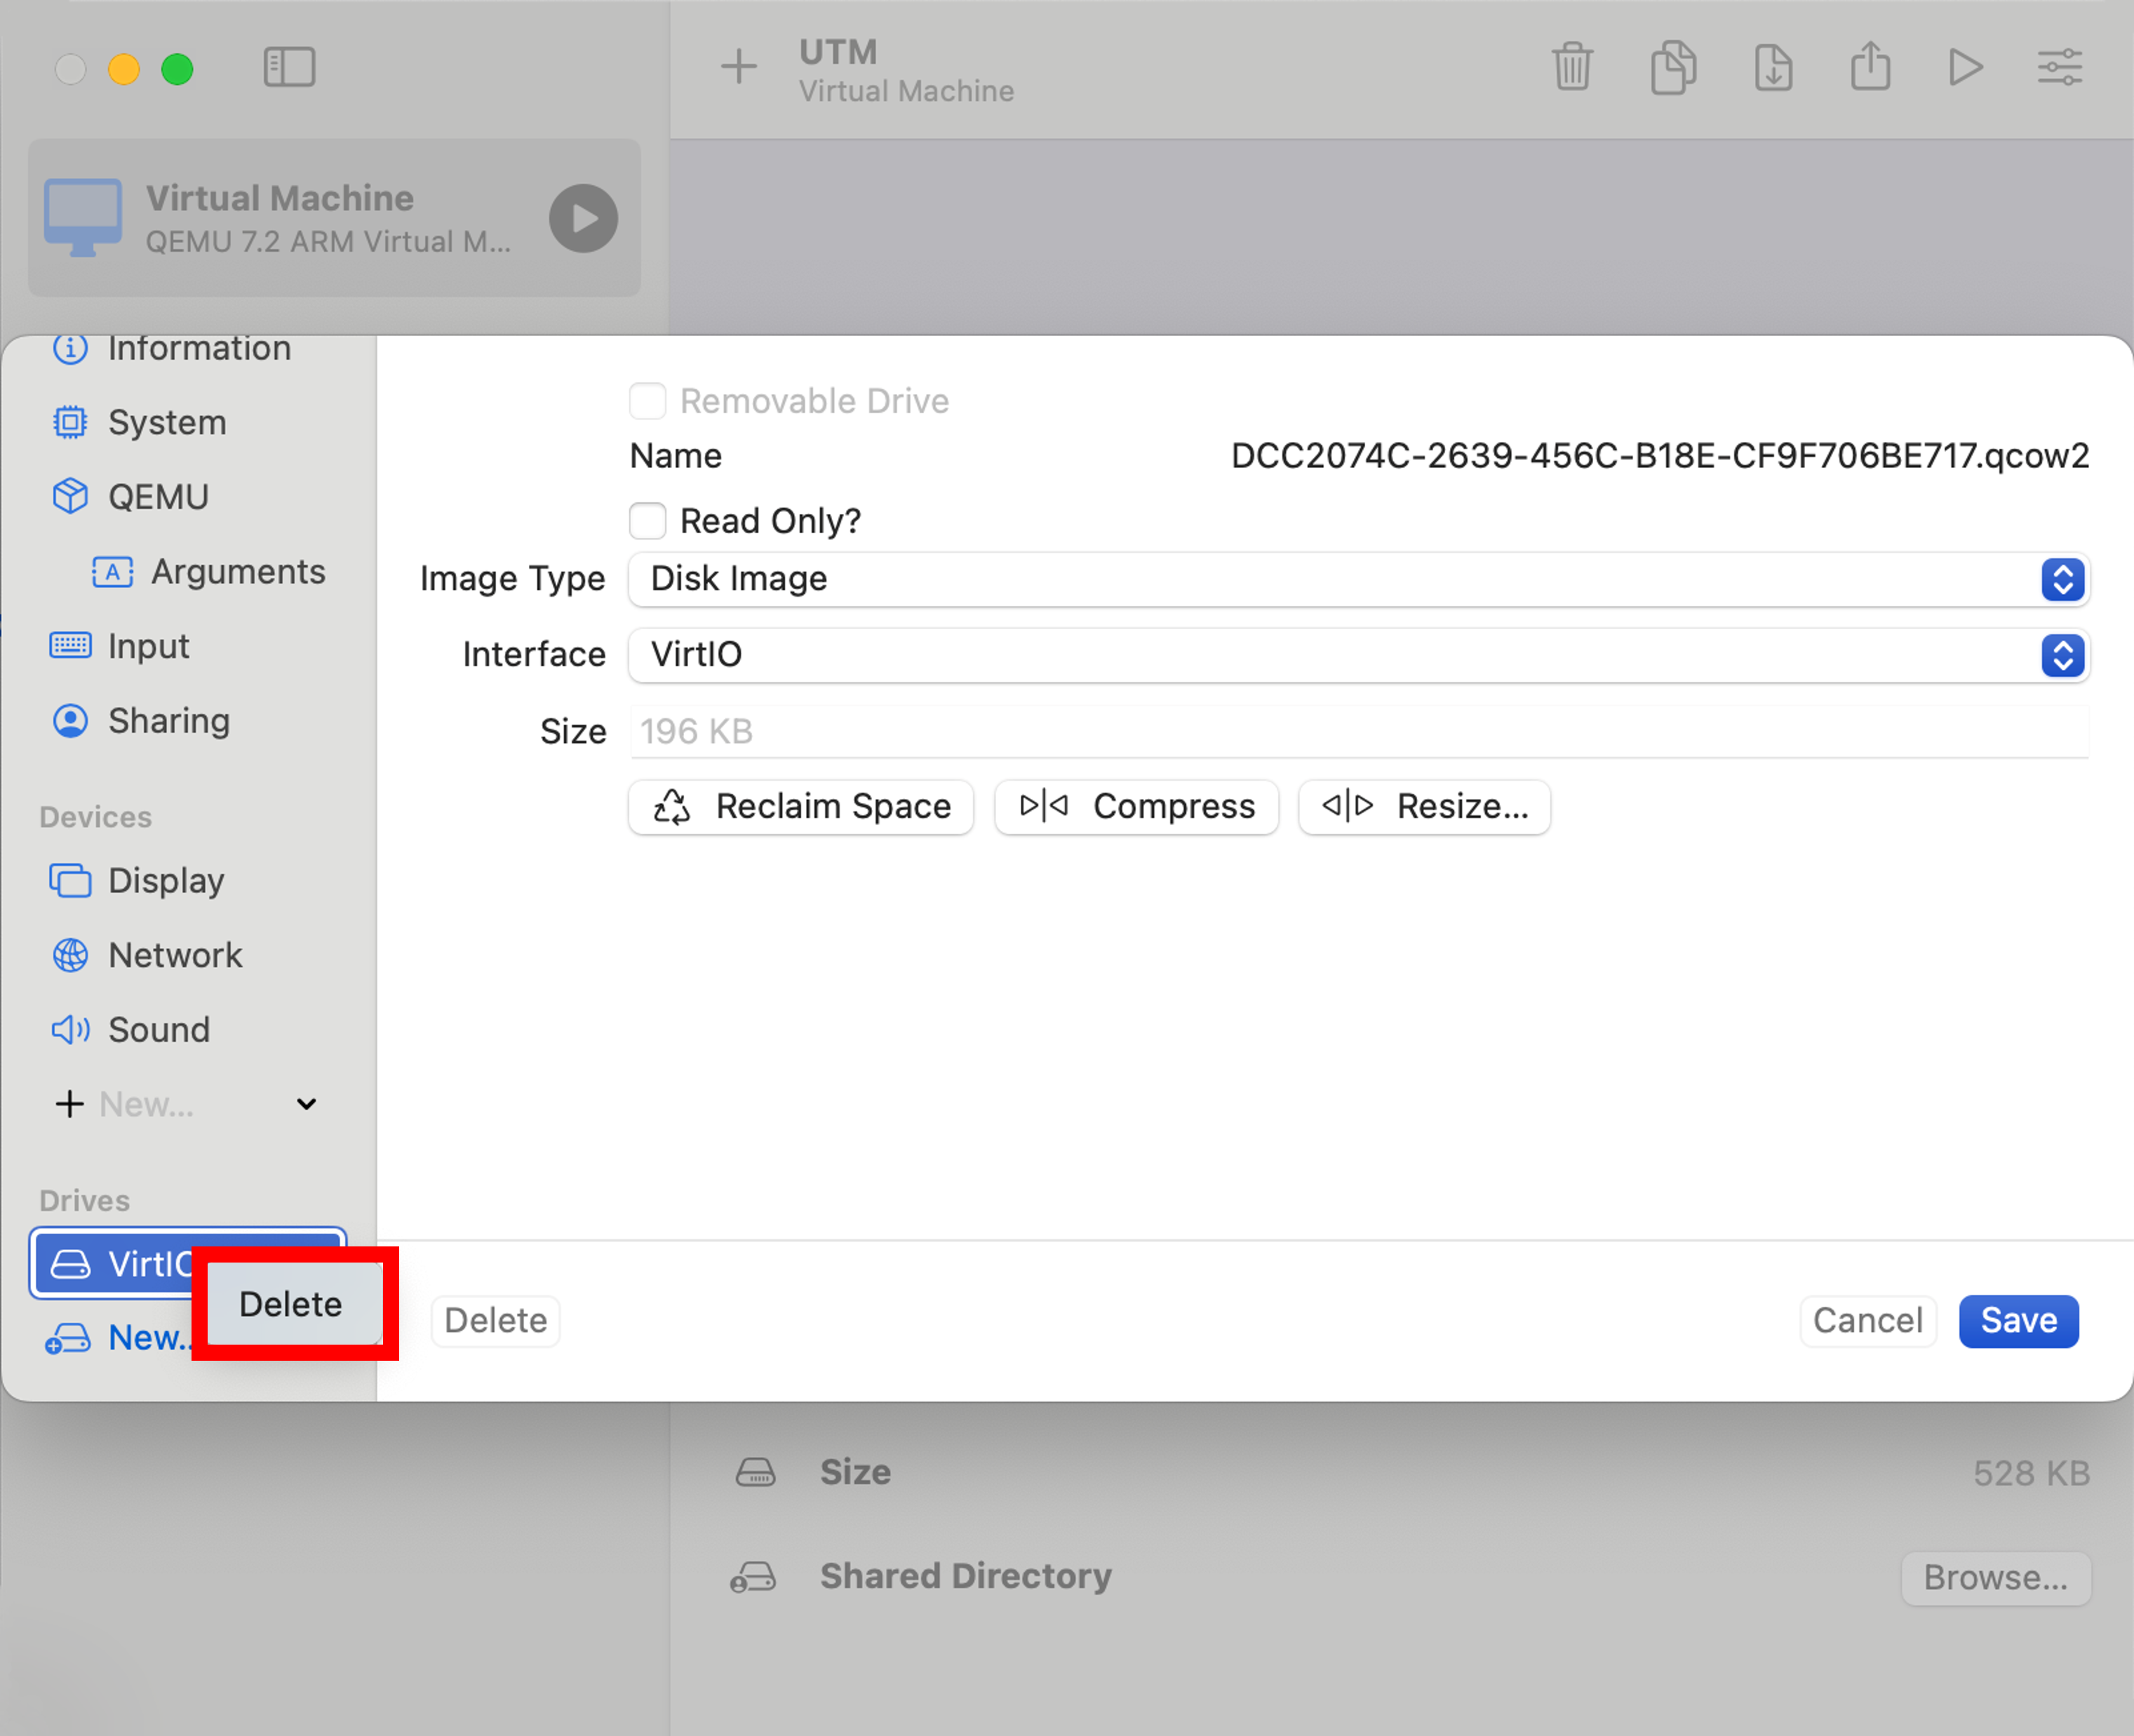
11. Click "New" and "Import" to import the QCOW disk.

12. Click on "Save" to finalize the VM.

Frequently Asked Questions (FAQ)
Here is an overview of all frequently asked questions. If you feel we should extend this list, please let us know.
- My terminal window only shows $ on the screen.
- This is a rare issue where the fish shell could not be started. Type fish into the terminal in question and it should present you the prompt you are used to.
Overview of all available Builds
The last three builds are kept on the server with a symlink pointing to the latest build. A simple overview of each architecture is provided under the links listed below. The build date is included in the name to differentiate them. Accessing them should not be necessary; the latest build should work.
| Version | Link |
|---|---|
| amd64 | OVERVIEW |
| i386 | OVERVIEW |
| arm64 | OVERVIEW |